Umbilicaria angulata
Recreating a Viking Age colour using rock lichen
This is the project that started my interest in dyeing with lichens. I wanted to recreate two silken tablet woven pieces that were recovered from matching wrist-bands or cuffs from a wealthy male grave in the Danish Viking Age settlement of Bjerringhøj in present-day northern Denmark (Walton 1991, pg 139). The cuffs have historically been referred to as the “Mammen cuffs”, in reference to the Mammen burial mound itself. The 10th Century mound contains an extraordinary array of fine textiles, the cuffs themselves are one of the most exceptional textile finds from the Viking Age due to the complex tablet weaving and intact state (Knudsen 2005, pg. 40). While their original purpose remains a mystery, they may have had a ceremonial purpose, or to indicate high social status and/or wealth.

The silk portion of the warp and weft of the tablet woven portion was originally purple using an orchil[1] source. If dyed in the Scandinavian region, the lichens would have from either the Ochrolechia or Umbilicaria genera; or alternatively, been dyed in the Mediterranean, the lichens were likely from the Lecanora or Rocella genera (Walton 1991, pg 139). The Ochrolechia or Umbilicaria genera lichens are found in coastal temperate regions in the northern hemisphere and are available here in coastal areas. Dyeing with lichens to achieve purple has been confirmed for several textile finds from the Viking Age (Walton 1989).
[1] Orchil: “Refers both to any species of lichen that will produce a violet-red to purple dye through steeping in ammonia, and to the various dye preparations made from them” (Cardon 2007, pg. 489).

Step 1: Locate some Umbilicaria
I found some on a coastal granite rock outcrop on an undisclosed Gulf Island. I wanted to harvest only a small amount and was able to gather much from around the base of the rock. I did harvest a small amount (maybe 5% of the extent of the lichen patch). In total, I ended up with about 53 grams of fresh lichen. Since then, I’ve learned more about sensitivities around rock lichens and I haven’t harvested more. As always, I recommend respectful harvesting practices.

Step 2: Try and get a proper identification
In this case, I took several photos and sent them to a lichenologist at the UBC Herbarium who was able to identify this species as Umbilicaria angulata. Now to start fermenting…

Step 3: Review your resources
I read over as much on lichen fermentation process as I could. I also dried the lichen and chopped it up into small pieces.

Step four: The vats
At the same time as collecting the Umbilicaria, I also collected a small amount of another black rock lichen. I set up separate fermentation vats with the two different lichens, but the process was the same. I added equal parts water to ammonia and lichen to two closed glass vessels. I then agitated them for four months. First agitating them several times a day, to daily and finally weekly.

Step 5: Fermenty bubbles
The two vats began to foam and one (the one with Umbilicaria angulata) began to turn first red and then purple. In this process, the dye pigment is gyrophoric acid which is a substantive dye (meaning it doesn’t require a mordant).

Step 6: Decanting
Once ready, I recanted the liquid through a sieve with the help of my friend Kate. I added enough water to cover the fiber and I added the silk in.

Step 6:
After four months, I emptied the vat into a large dye pot and added two skeins of scoured silk. I heated the silk for two days, cooled it in overnight and then left it to hang another day before washing it in water and leaving it to dry.

Done!
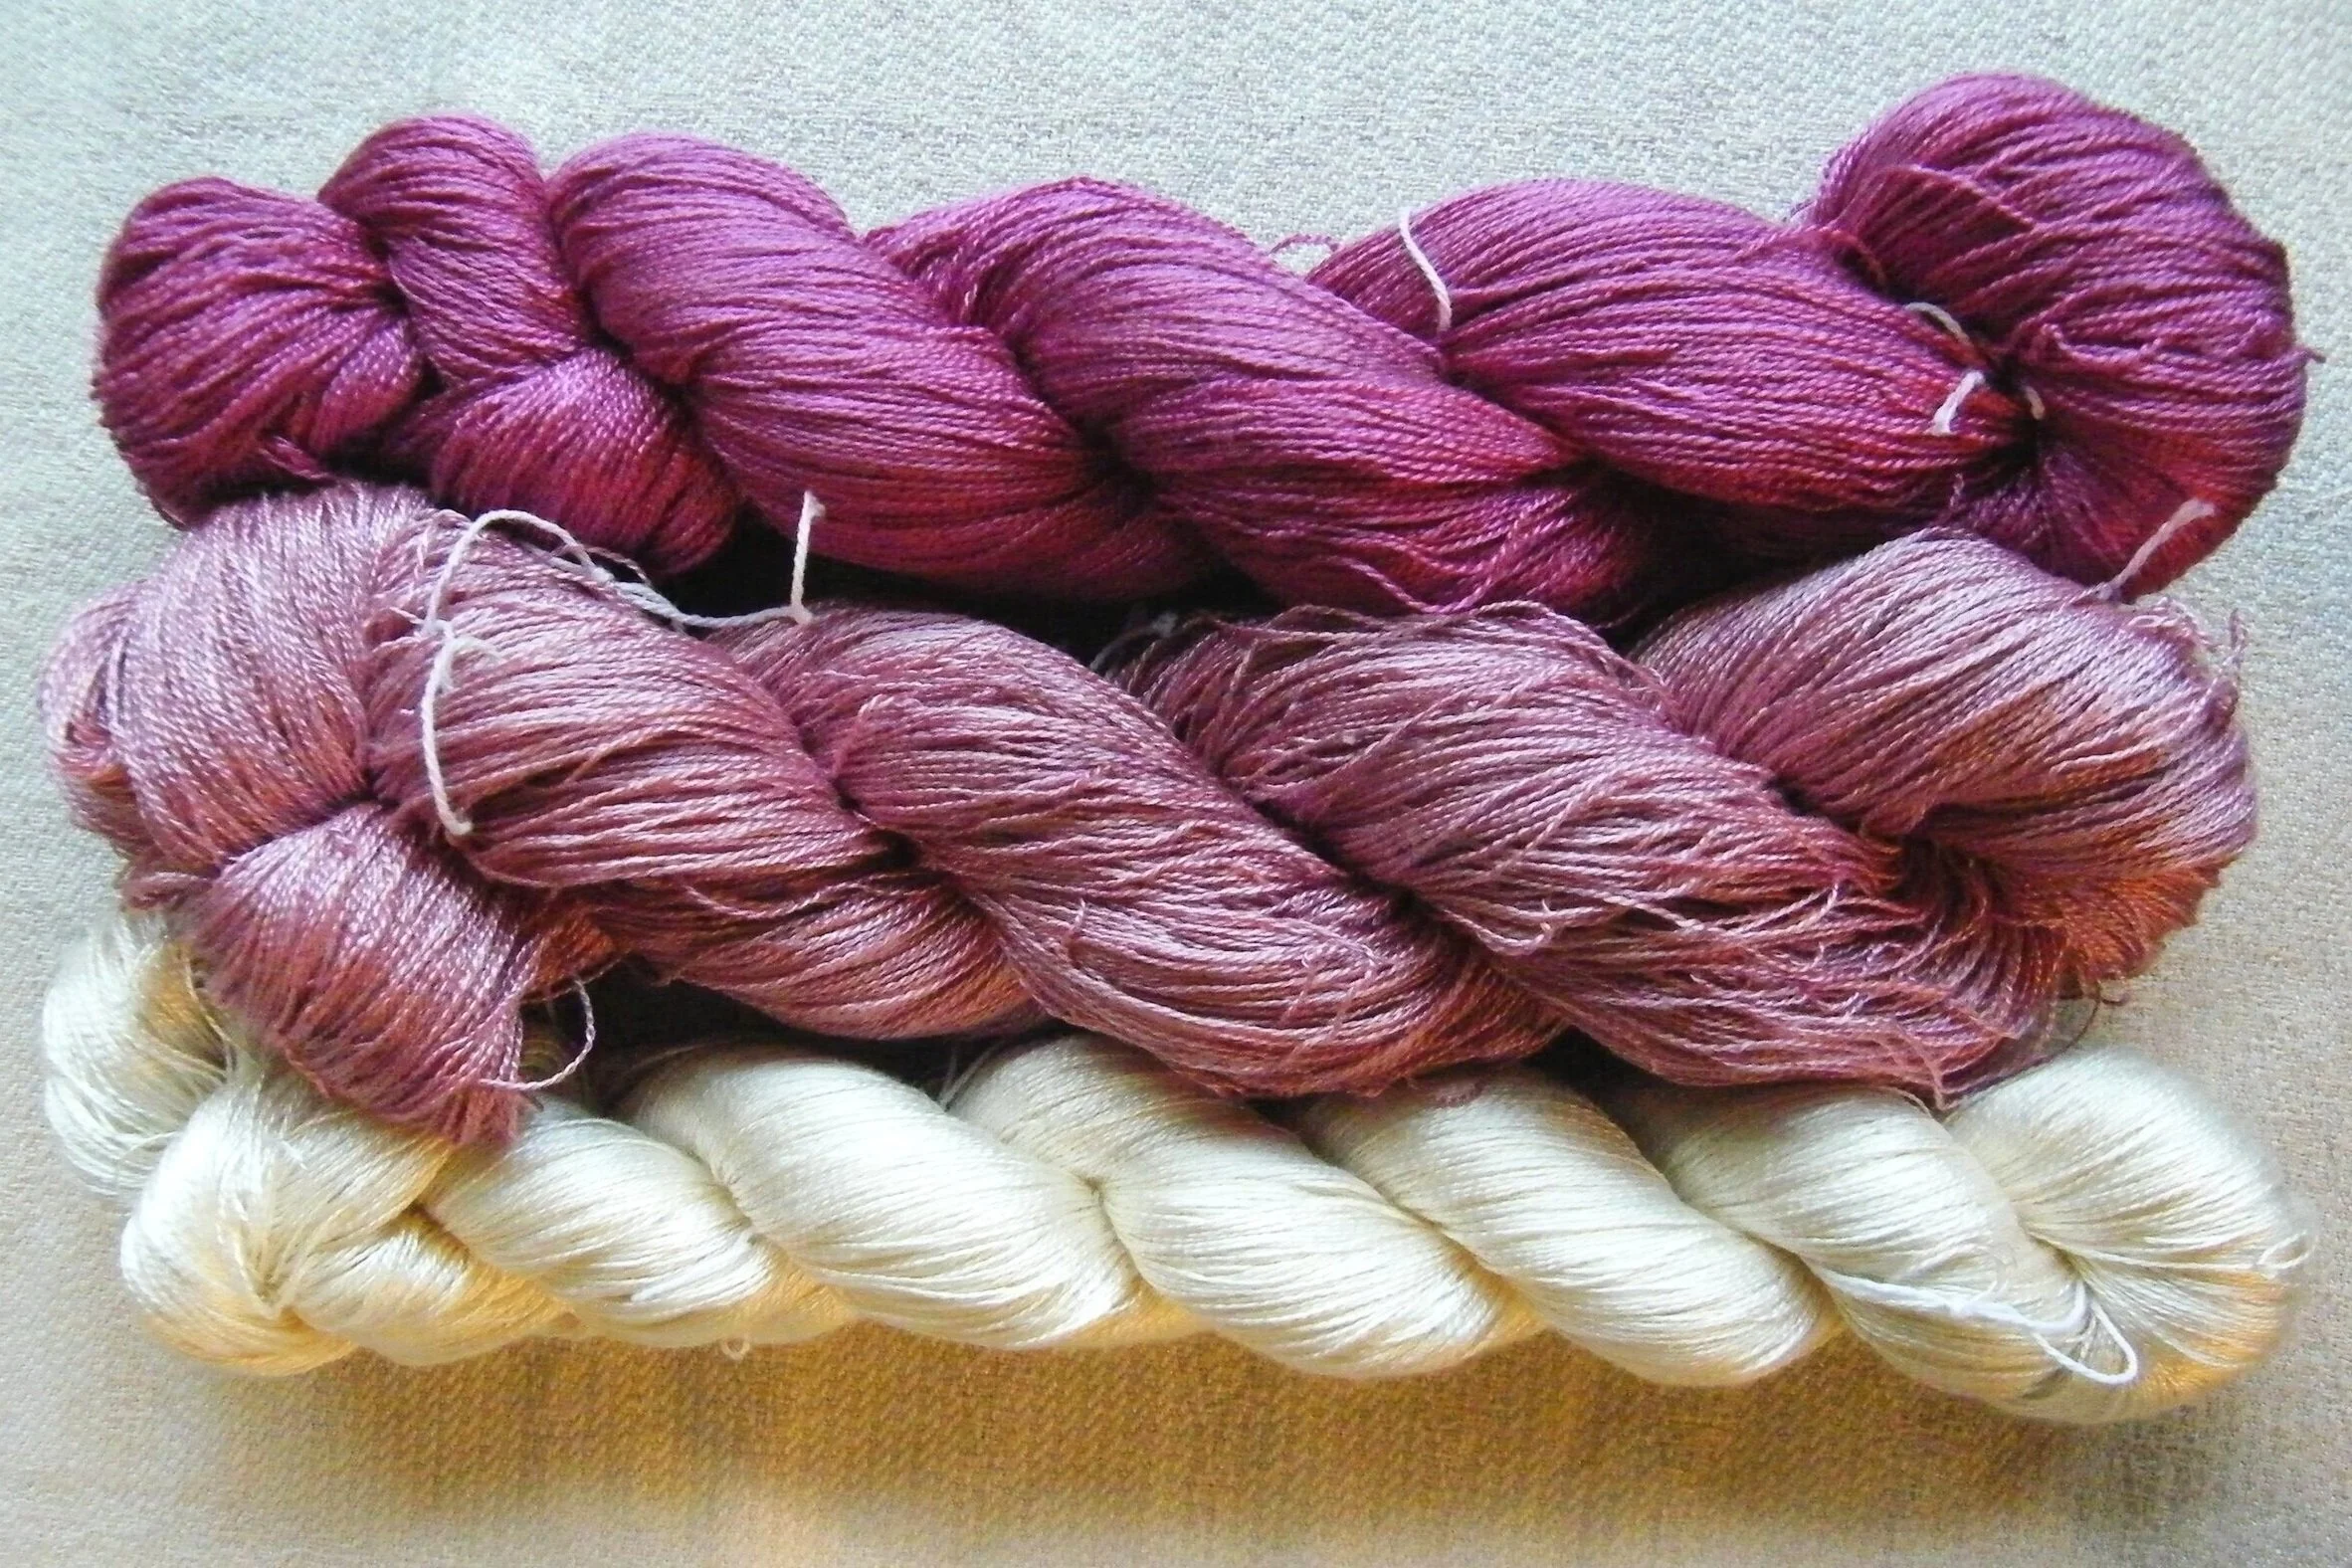
The top skein is from the first dye. The exhaust bath dye is in the middle and the bottom shows the original silk colour.

Tablet Weaving
Sometimes people ask what I do with all the yarn I dye. Here I wanted to weave it using inlayed brocaded fine metals in order to try and recreate the original weaving as much as possible (this weaving also included undyed linen warp threads but I didn’t cover that in this post).

Off the cuff
This is a picture of one of the recreated cuffs with the purple-dyed silk visible in the weaving. The fabric for the cuff was dyed with madder and woven on a warp-weighted loom. Did I mention I’m a giant nerd?
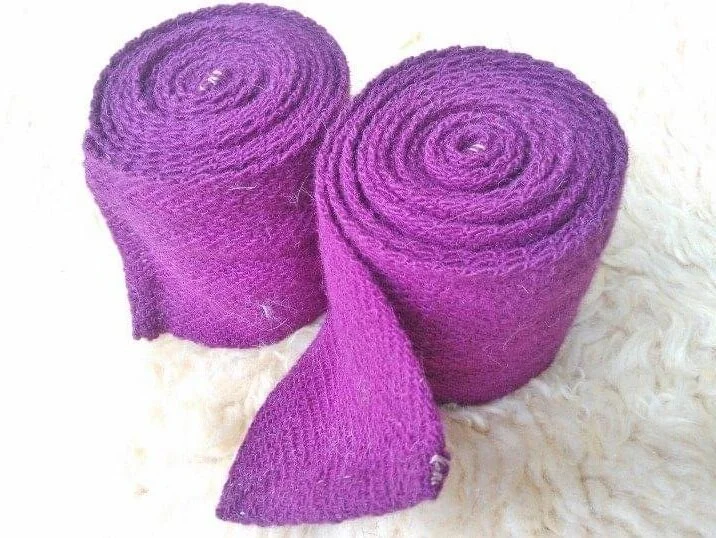
Follow up - after the silk, I dyed a pair of Viking Age leg wraps which started out as white wool. They came out a truly luminous purple. Not especially resistance to sunshine, but eye-searingly purple none the less.